
Objectives
This article in 2 parts, explains step by step how to set up a Microsoft Dynamics CRM 2016 development server on an Azure Virtual Machine and to open it to the Internet via the CRM Internet-Facing Deployment.
These steps are not intended to be followed for a Production server as they rely on a single Virtual Machine for all the infra-structure including:
- Windows Server 2012 R2 Operating System
- Active Directory Domain Services role,
- Web Server (IIS) Role
- Active Directory Federation Service (ADFS) V3.0 role,
- SQL Server Enterprise 2014 SP1,
- and of course Dynamics CRM 2016 with all roles on the same server.
This is clearly not a configuration recommended and supported by Microsoft but it’s very didactic as it touches to a good range of Microsoft server technologies and concepts.
This deployment adds a bit of complexity regarding some required work-arounds to make it run properly, but also remove some complexity in overall (less servers to deploy and configure, lower administration). Some straight lines and assumptions are taken, for example regarding the Windows accounts that again is not suitable for a Production environment.
Part1 covers the core infrastructure installation with MS Dynamics CRM 2016 configured for a simple AD Authentication, restricted to internal users. The schema below highlights the process:
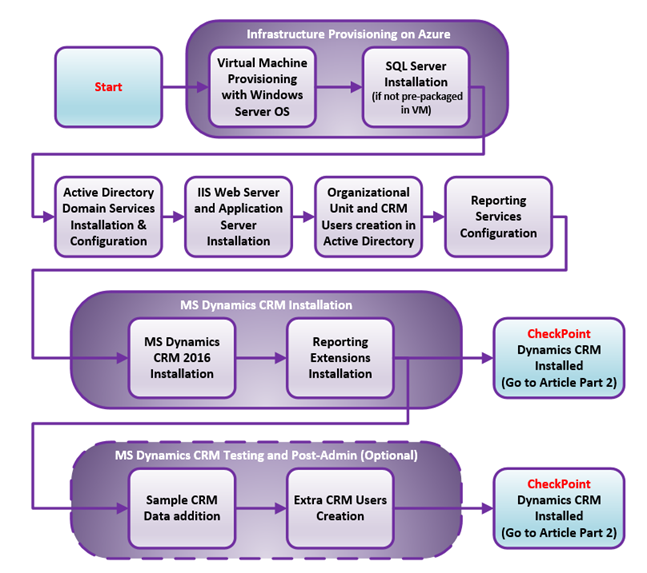
You can complete Part 1 of this article and stop there with a fully functional Dynamics CRM 2016 server accessible only from the server itself.
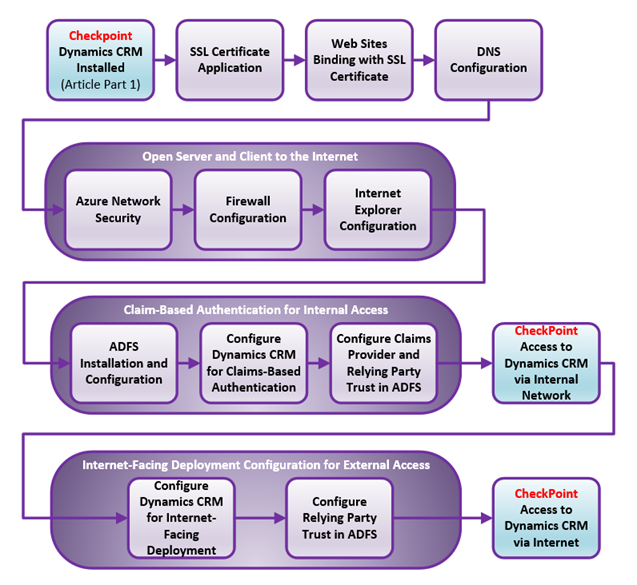
Part 2 covers the Internet-Facing Deployment configuration of Dynamics CRM 2016 to have it support Claim-Based authentication for internal and external access thanks to the MS Active Directory Federation Service. The schema below highlights the process:
Requirements
For this deployment you need:
- An Azure account: https://azure.microsoft.com with some credit available,
- A Dynamics CRM 2016 On-premise license key (ideally through a MSDN subscription like Visual Studio Ultimate or you can use a trial key).
Virtual Machine Provisioning on Azure (new Portal)
2 alternative options are presented here:
- Option 1 relies on an Azure Virtual Machine provided with both Windows Server 2012 R2 and SQL Server Enterprise 2014 SP1. This option is interesting if you do not have a license of SQL Server but would cost more since it will come with a mandatory storage disk, especially if you go for the premium SSD version
-
Option 2 relies on an Azure Virtual Machine provided with only Windows Server 2012 R2. You’ll have to install your own SQL Server, but it is possible to make it use the VM disk space instead of an independent storage disk, which is fine for a development box.
Option 1: VM with Windows Server 2012 R2 + SQL Server Enterprise 2014 SP1
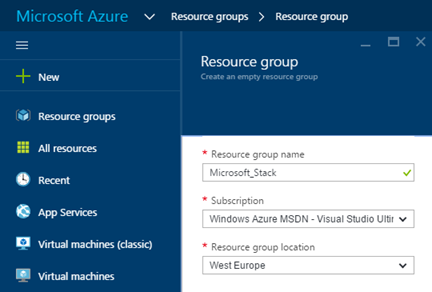
You need, first of all, a Resource group on the new Azure Portal:
- You can create it by clicking “New” à “Resource group”:
- Give it a name, select your Azure subscription and then pick a location that is closest to you
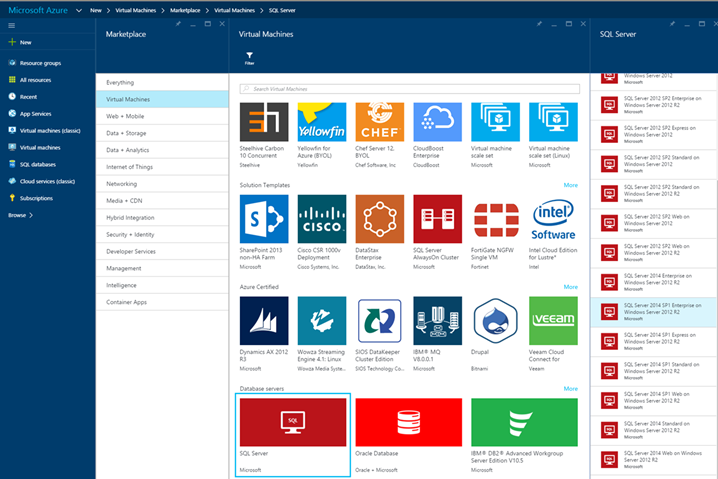
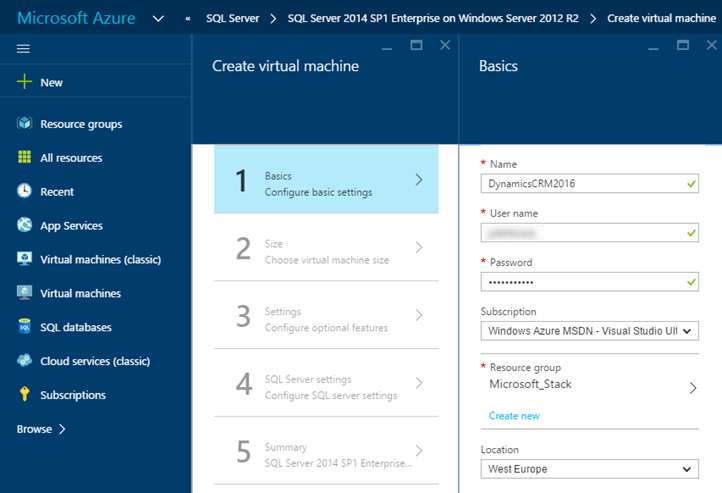
You can now create a new Virtual Machine from the new Azure Portal:
- Pick the “Database Servers” group and select the “SQL Server 2014 SP1 Enterprise on Windows Server 2012 R2”
- SQL Server Enterprise is recommended (64 bits), SQL Server Compact or Express are not supported for Dynamics CRM (see Requirements in the links provided on the second article, Part 2)
- Name your Virtual Machine
- Define your admin account that will be used for the rest of this article
- Select your Azure subscription
- Select your Resource Group
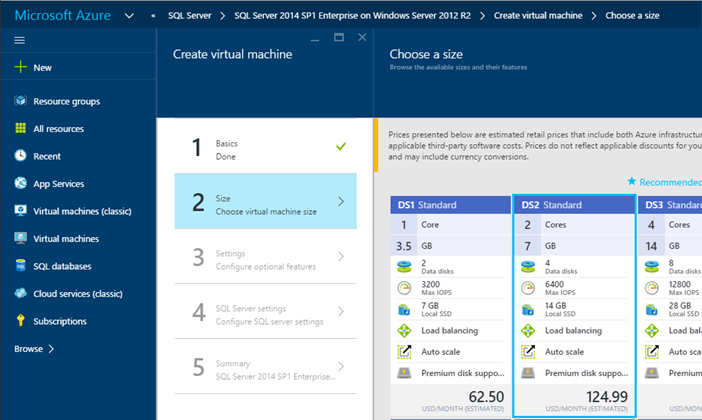
On the next page you need to size your Virtual Machine:
- Be careful with your choice, this is going to impact your burn rate and overall cost
- We pick the DS2 Standard with 2 Cores, 7 GB of RAM, a disk of 14 GB that seems comfortable for a development environment
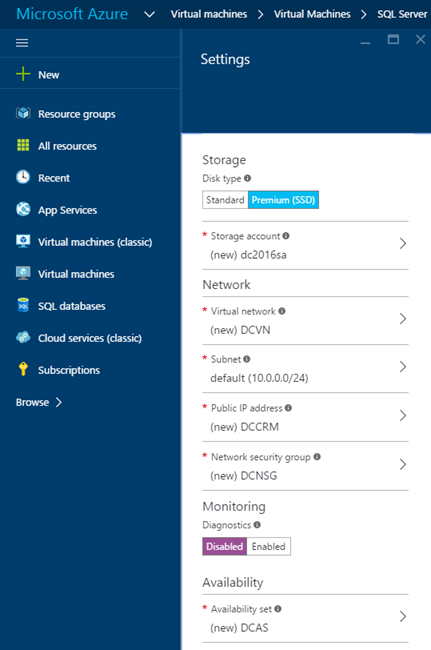
- On the next page we would recommend the Standard disk type for a development box (the premium one adds a lot to the Azure burn rate)
- We take the opportunity to create a Storage account, a Virtual Network with a public IP (static), Network Security Group from this interface
- The Availability Set is not required for this dev. Environment
-
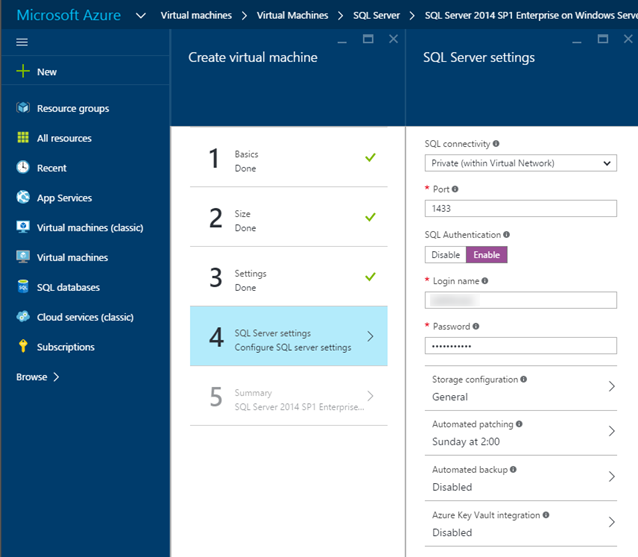
On the next page we define the SQL Server settings:
- SQL connectivity: Private
- Port: 1433 by default
- Optionally Enable SQL Authentication and create a login and password for the SQL authentication (Windows Authentication only is fine)
Once the VM provisioning is complete, select “Connect to open a remote desktop session” and access your VM from your remote PC or Mac with Microsoft Remote Desktop. This software can be installed for free on Windows or iOS.
- Use your VM username and password to access your Virtual Machine
- By default, the Remote Desktop access port 3389 is enabled on your VM but be aware that this is the only open port to start with
-
Don’t try to ping your VM with your public IP, Azure doesn’t seem to let it going thru
Option 2: VM with Windows Server 2012 R2 only
Make sure you have a Resource group on the new Azure Portal (see Option 1).
You can now create a new Virtual Machine from the new Azure Portal:
- Pick the “Windows Server 2012 R2 Datacenter”

- Follow the same steps as Option 1, but you will not encounter the SQL Server settings.
Now we are going to install our own database software.
Transfer across your VM an installer of Microsoft SQL Server 2014 SP1 Enterprise (or another MS SQL Server version supported by Dynamics CRM 2016) and launch the installer.
- Select ‘New SQL Server stand-alone installation’

- Accept the software license terms on the next screen
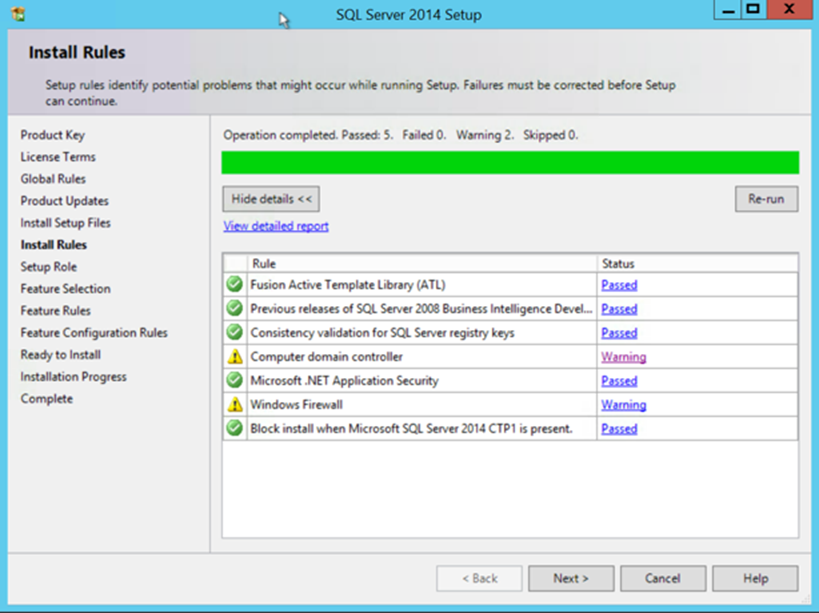
- On the Install Rules screen, you can ignore the warnings about the Computer Domain Controller and Windows Firewall, since we are building a development environment
- On the Setup Roles screen, select ‘SQL Server Feature Installation’ and click ‘Next’
-
On the Feature Selection screen make sure to check the following features:
- Database Engine Services
- Full-Text and Semantic Extractions for Search
- Reporting Services – Native
- Management Tools – Basic
- Management Tools – Complete
- Leave the default installation paths proposed by the wizard

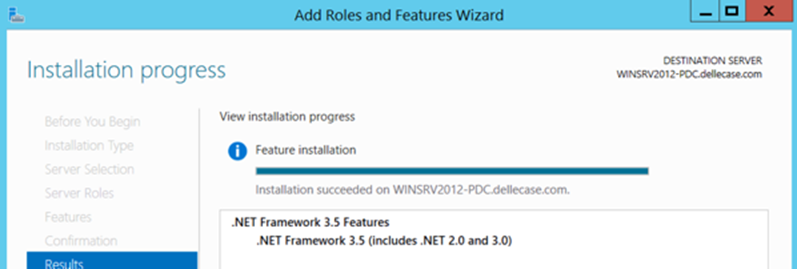
- On the next screen, you maybe signaled some missing features like the .NET Framework 3.5 Feature. You’ll need to go and add those features via the Server Manager (Manage à Add Roles and Features). You can proceed with the installer afterward if no reboot is required.
- If no missing features, you’ll reach the Instance Configuration screen
- Leave the Default instance with its default Instance ID

-
On the Server Configuration screen, associate the following Account Names:
- SQL Server Agent: NT AUTHORITY\SYSTEM
- SQL Server Database Engine: NT AUTHORITY\SYSTEM
- Leave the other accounts as default

-
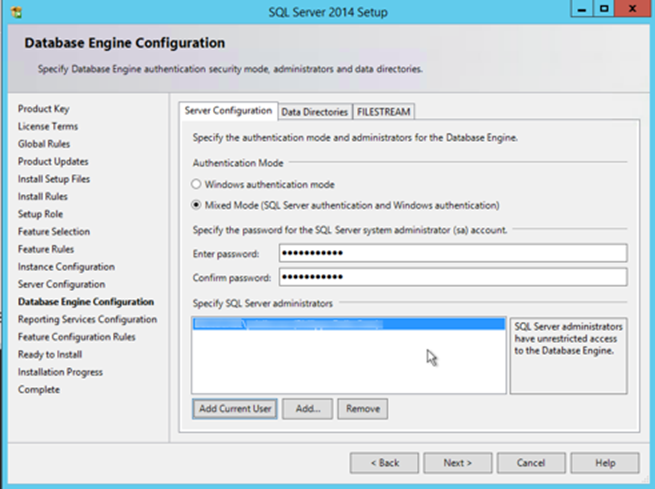
On the Database Engine Configuration, you can keep the Windows authentication mode or optionally use the mixed mode
- In that second case, provide a password for the ‘sa’ account
- Click the button ‘Add Current User’ to add your current admin account as the SQL Server administrator. You can also add later other users such as your CRM Admin user.
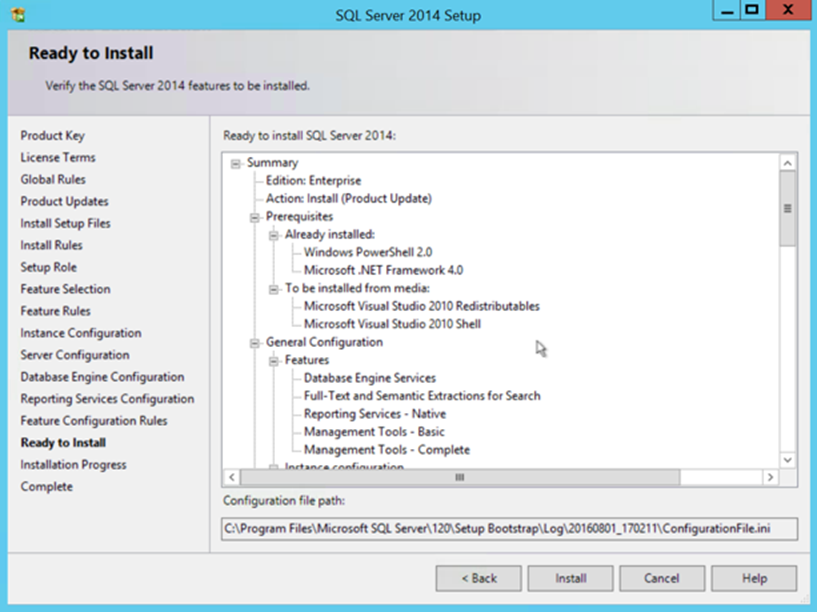
- On the next screen, confirm ‘Install and Configure’
- And finally, you’ll be ready to install … click ‘Install’
- Check the Windows services, and make sure the SQL Server Agent is running. If not, you’ll have to change the Log On user in the service properties and use an admin user declared in the Active Directory (like your current user).
Active Directory Domain Services Installation and Configuration
Access your VM via Microsoft Remote Desktop, open the Server Manager:
- Click “Add Roles and Features”
- Leave the choice “Role-based or feature-based installation”
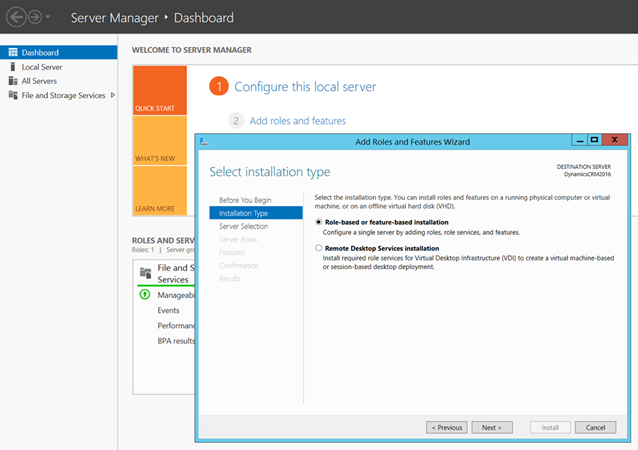
- Select your server from the server pool

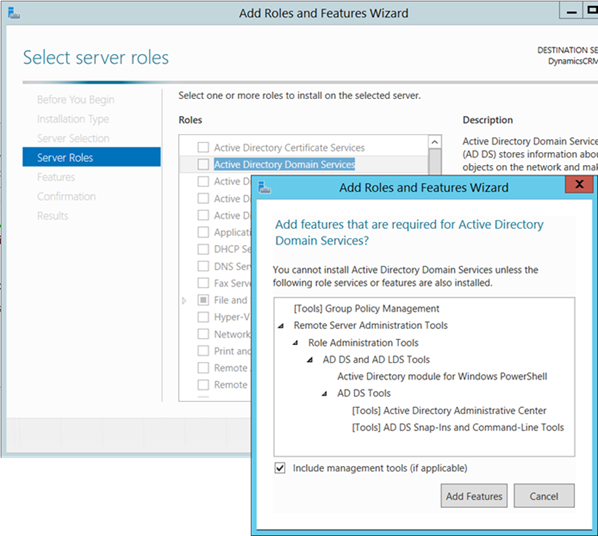
- Add the Server Role “Active Directory Domain Services”
- Accept to add all the required features for Active Directory Domain Services
-
Make sure to also include these features:
- Windows Identity Foundation 3.5
- Windows Search Service
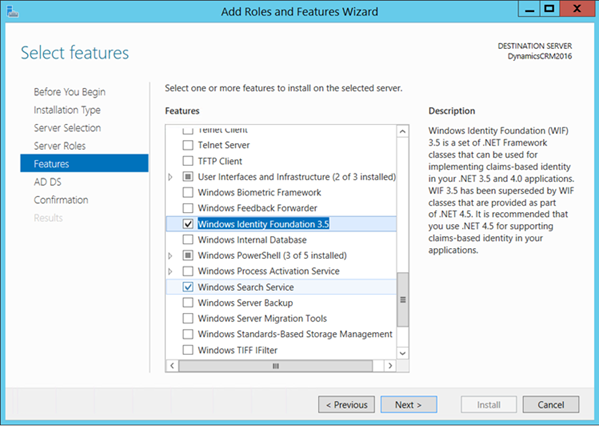
- Click “Next” button

- Click “Next” button and accept the Wizard to automatically restart the server if needed

- Click “Install” and wait the end of the process
- Click “Promote this server to a domain controller”

- Check “Add a new forest”
-
Define your Root domain name: e.g. mydomain.com
- It will be matching the domain we will register with a public internet Domain provider later, so select it carefully and check if this domain is available
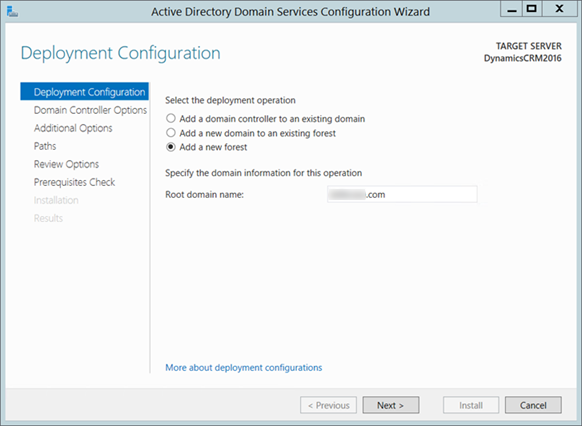
- Click “Next”
-
On the next page, fill up the following fields:
- Forest functional level: Windows Server 2012 R2
- Domain functional level: Windows Server 2012 R2
- Check the box “Domain Name System (DNS) server”
- Choose a password for the Directory Services Restore Mode (DSRM) and note it somewhere safe
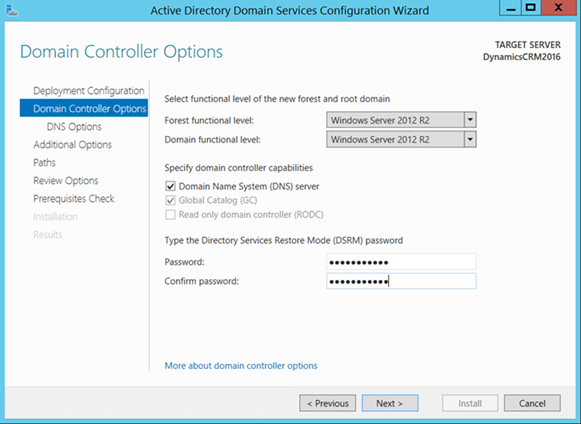
- Click “Next” to reach the DNS Options
- Ignore the popup message notifying you that “a delegation for this DNS server cannot be created…” as this is irrelevant for a developer server

- Click “Next” and verify the NetBIOS domain name assigned to the domain
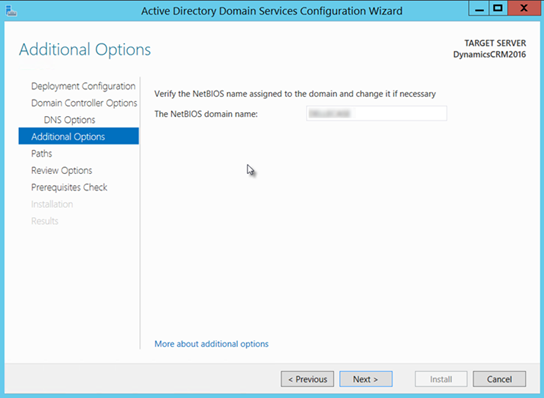
- Click “Next”
- Accept all the default locations for the AD DS database, log files and SYSVOL
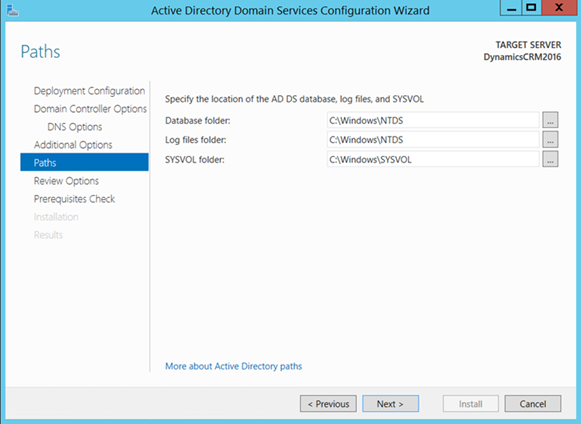
- Click “Next” and make sure the Prerequisites Check is passed

- You can safely ignore the warnings from the Prerequisites Check
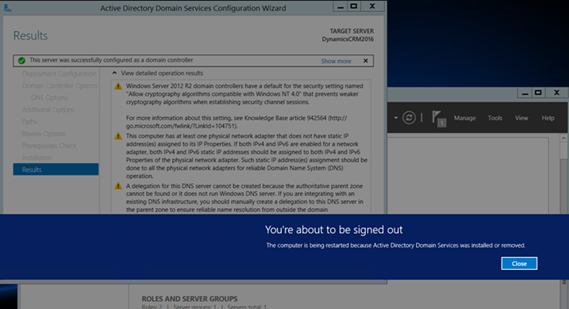
- Click “Install”
-
The server reboots at the end of the promotion operation, this is fine, you’ll be able to connect again in a few minutes
- You’ll use your domain credentials instead of your local server account, e.g. mydomain\login
IIS Web Server and Application Server Installation
Open again the Server Manager:
-
Add more server roles:
- Application Server
- Web Server (IIS)
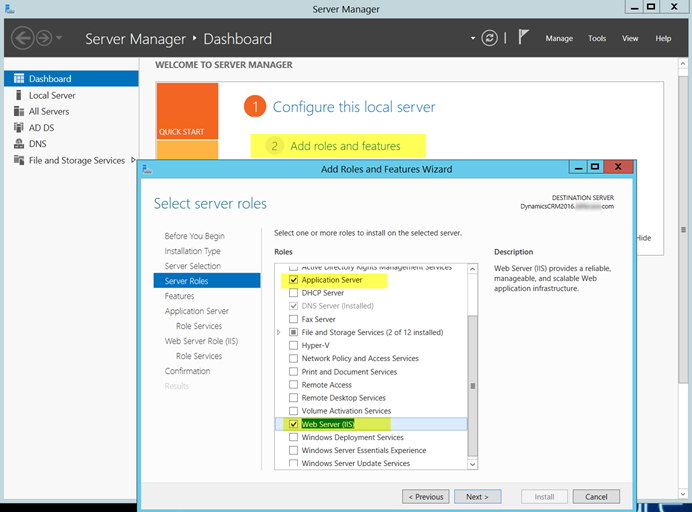
- Click “Next”
- Leave the selected features

- Click “Next”
-
On the “Role Services” page for the Application Server, check the following services and add all related features:
- .Net framework 4.5
- Web Server (IIS) Support
- HTTP Activation
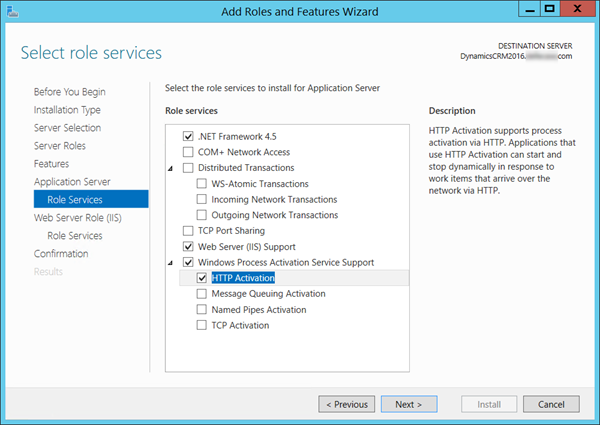
- Click “Next”
-
Select the following Management Tools on the “Role Services” for the Web Server (IIS):
- IIS Management Console
- IIS Management Scripts and Tools
- Management Service
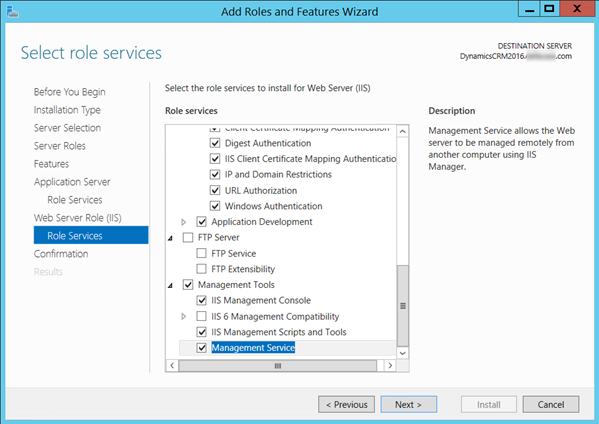
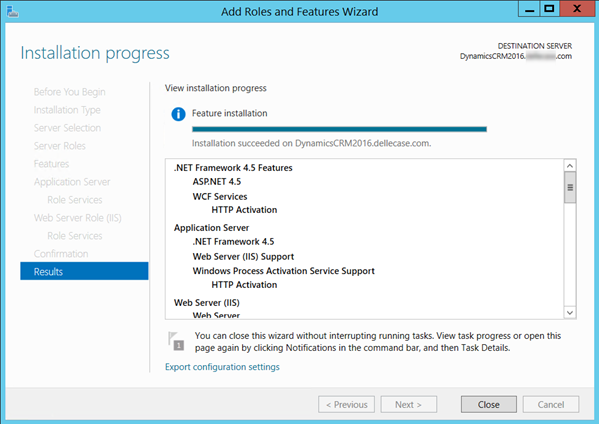
- Click “Next” and “Install’ then wait the installation process to complete
- All the new server roles will now appear in the Server Manager
Organizational Unit and CRM Users creation in Active Directory
Now we are going to add in the domain an Organizational Unit and some users for the CRM:
- From the Server Manager, click the “Tools” menu and select “Active Directory Administrative Center”

-
Create some CRM users, e.g.
- CRM Administrator: mydomain\crmadmin
- Better check Account never expired for dev users

- Add the administrator account into the performance Log Users (it is required if you use this account for the Dynamics CRM set up)

- Don’t forget to add a password for your users
- Click “OK” for each user

- Next, create a new “Organizational Unit”
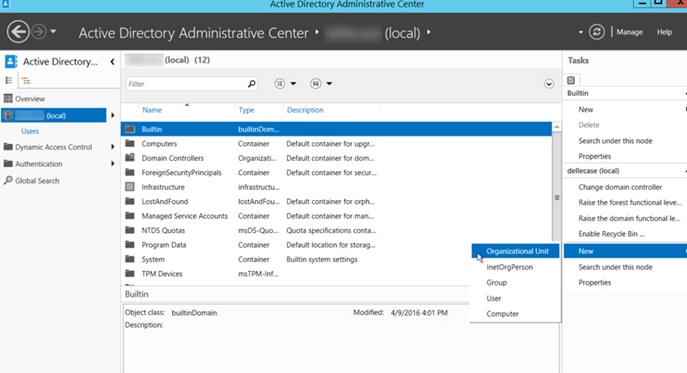
-
On the Organizational Unit page:
- Name=CRM2016
- The CRM setup will add its specific AD security groups in this OU
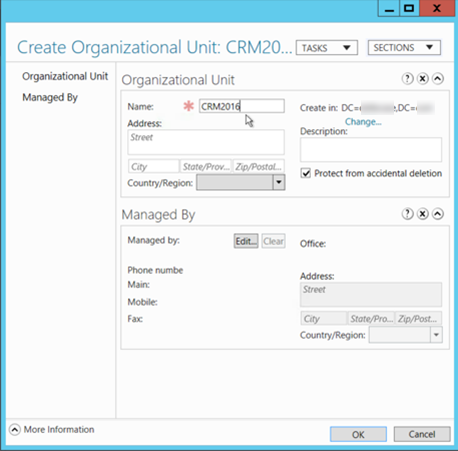
-
Click “OK” and leave the wizard
Reporting Services Configuration
Reporting Services are already installed on the VM with SQL Server Enterprise 2014 SP1. We just need to perform a few configuration steps:
- Open the Reporting Services Configuration Manager and connect it to your server
-
Select Report Server Service Account as “Use built-in account” and pick “Local System”
- Note that the Report Server local account is not supported by Dynamics CRM

à If you went for the option 2 and installed SQL Server yourself, then you can ignore the following steps about the Reporting Services.
- Click “Apply” and move on to the “Web Service URL” page
- Just click the “Apply” button to create the IIS directory with default settings on the default web site
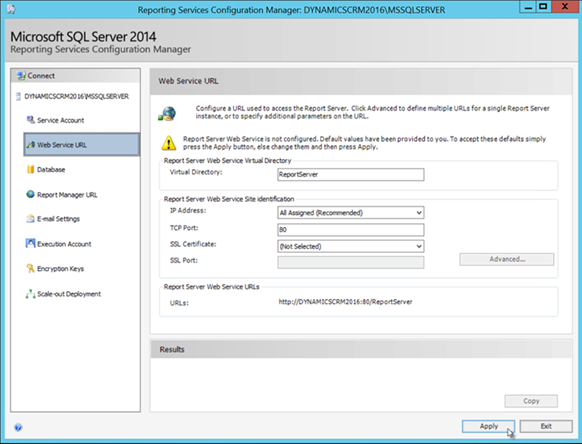
- Click “Apply” and move on the “Database” page
- Click the “Change Database” button
- On the popup wizard, select “Create a new report server database” and click “Next”
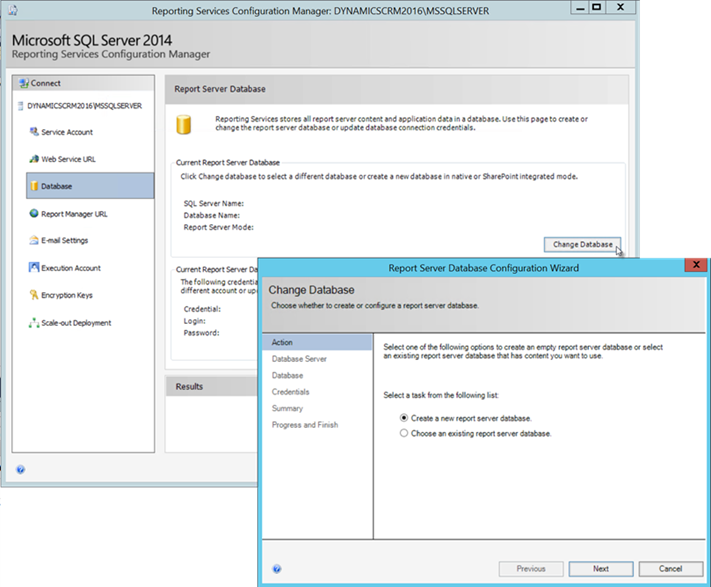
- We are done with the SQL Server Reporting Services (SSRS) configuration

Microsoft Dynamics CRM 2016 Installation
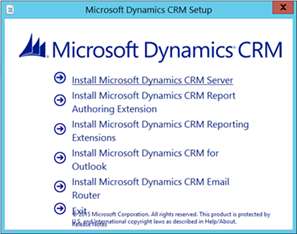
Now it’s time to install Microsoft Dynamics CRM 2016 Server. Launch the Setup:
- Click the link “Install Microsoft Dynamics CRM Server”
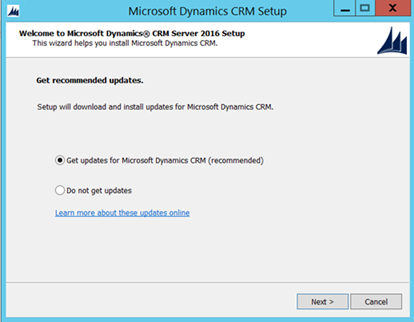
- Get the updates for Dynamics CRM if any
- Click “Next”
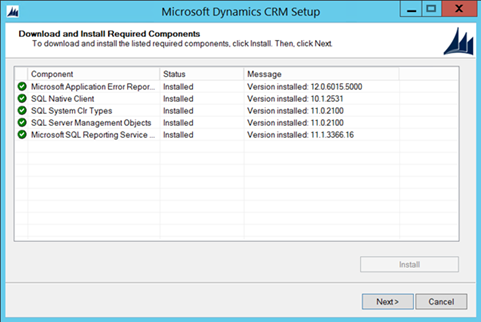
- Install all the listed required components
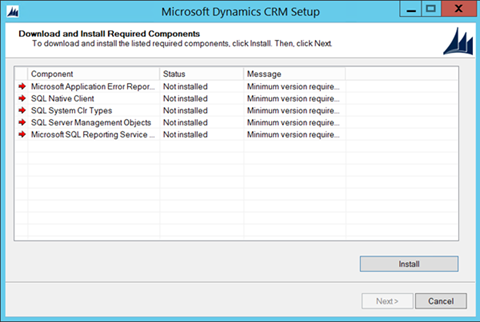
- Click “Next” if all components were installed successfully
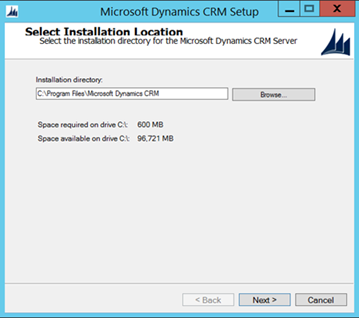
- Choose a path for the installation files, the default is fine
- Click “Next”
-
Specify the Server Roles
- We are building a development environment where all Server Roles are deployed on the same server, so check all tick boxes
- In Production, we would probably dispatch the different roles on multiple servers with some redundancy servers in play
- Click “Next”

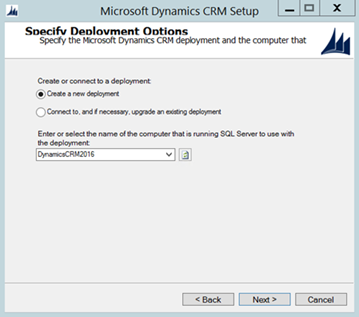
- On the Deployment Options, select “Create a new deployment”
- Select the name of the computer that is running SQL Server, the same as the one where you’re installing Dynamics CRM
- Click “Next”
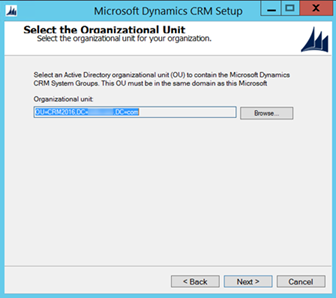
- Browse and select the Active Directory Organizational Unit (OU) created earlier
- Click “Next”
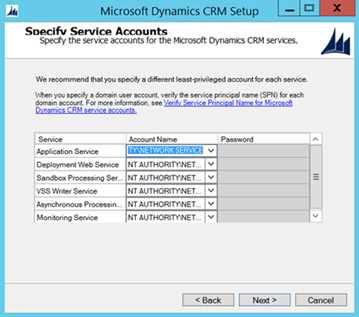
- On the Service Accounts specification page, we should normally define one specific account per service, but that would be for a Production environment
-
In our case, we’ll keep the default “Network Service” for all services
- You could use a specific account like the “CRM Admin” you created earlier, but we decided to leave this account to be effectively the CRM Administrator later
- Click “Next”
-
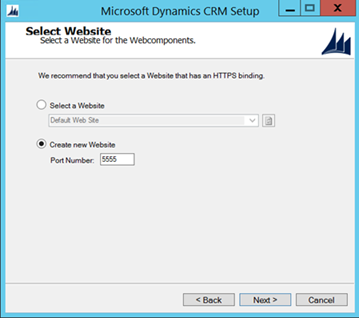
On the Website page, it is very important in our case to create a new website dedicated to Dynamics CRM
- The default Web site is reserved for ADFS and in our typical scenario is not recommended to use (even if our version of ADFS doesn’t really rely on IIS, there are still some binding magic going on)
- Create a new Website with Port Number = 5555
- Click “Next”
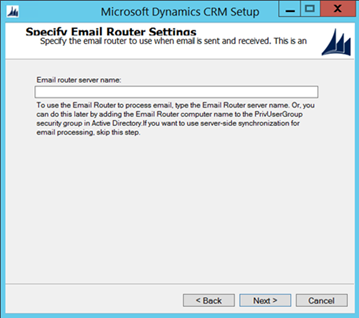
- We do not plan to deploy the Email Router now (this can be done later)
- Leave the box blank and click “Next”
-
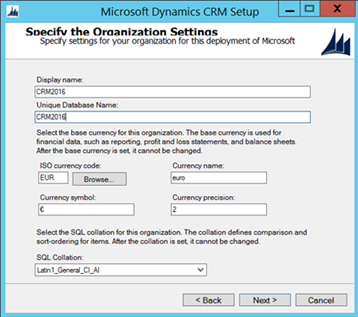
On the Organization Settings screen, fill up:
- Display Name: CRM2016 (same as Organizational Unit)
- Unique Database Name: CRM2016 (same as Organizational Unit)
- Select your currency
- Leave SQL Collation by default
- The selected Organization Name “CRM2016” will be reused in the subdomain of the external URL so choose it carefully
- It is possible to add other Dynamics CRM Organizations in top of this one later
- Click “Next”
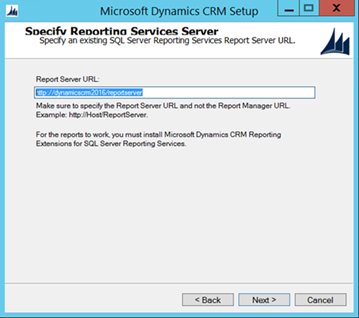
- Check that the default Report Server URL is correct (see in Reporting Services configuration)
- Click “Next”
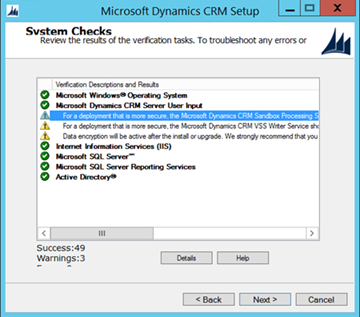
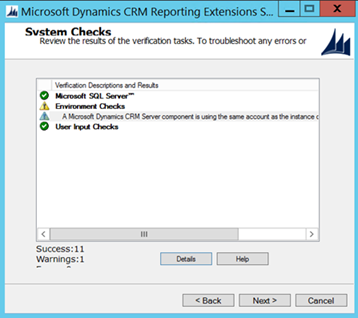
- This is time for a full system checks
- Don’t worry too much about the security warning, there are normal because we are deploying a development environment
- Click “Next”
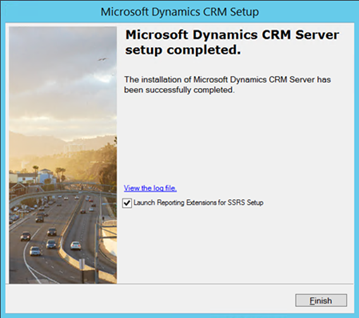
- You should reach out the final screen when the Dynamics CRM Server installation is completed
- Tick the box “Launch Reporting Extensions for SSRS Setup” so the next wizard can start
- Click “Finish”
- IIS should now have the Microsoft Dynamics CRM web site in top of the Default Web Site, you can do this quick check

Reporting Extensions Installation
In order to start the CRM Reporting Extensions setup wizard, you could have ticked the dedicated box on the previous wizard or launch it manually from the Dynamics CRM setup:
- Check “Get updates for MS Dynamics CRM”
- Click “Next”

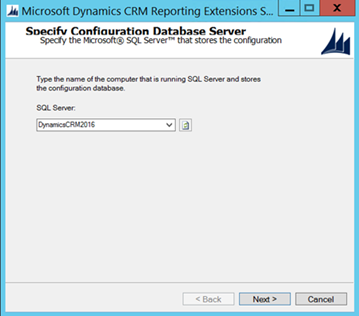
- Select the Database Server, in our case it is deployed on the same server
- Click “Next”
- Select the SSRS Instance name by default
- Click “Next”

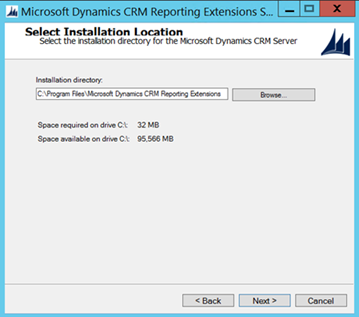
- Leave the default Installation directory
- Click “Next”
- Time for the system checks
- Again, in the case of our Development server, we are not too worried about the security warnings
- Click “Next” and start the installation
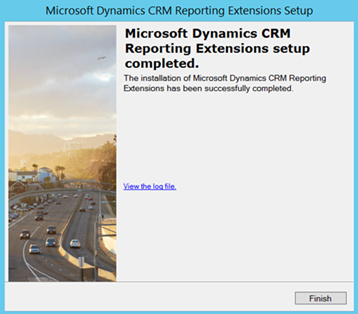
- This is the completion screen you see when the installation is done successfully
Dynamics CRM 2016 Testing and Post Admin
Accessing Dynamics CRM 2016 for the first time
You can access to Dynamics CRM 2016 with the url: http://{your_server_name}:5555
- Do a quick test drive and make sure everything works all right

Sample CRM Data Addition (Optional)
For a Development environment, it’s always a good idea to add some test data. Good news, Dynamics CRM has got a few in store for you:
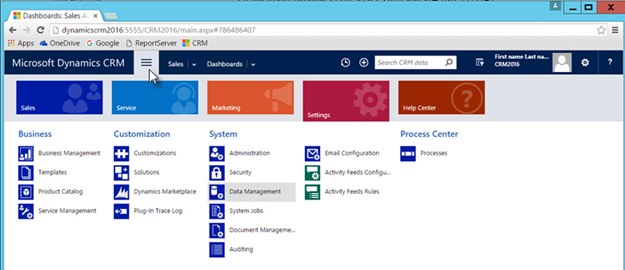
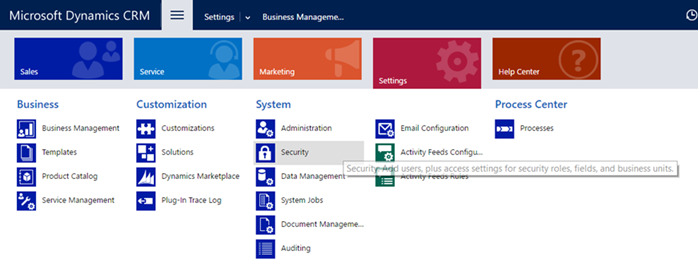
- Pick the “Settings” in the main menu
- Click on “System”à“Data Management”
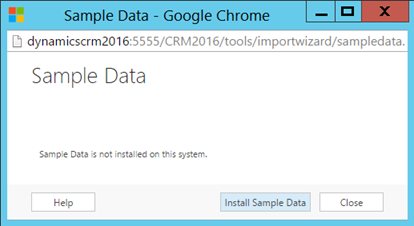
- On the next page, select the icon “Sample Data”
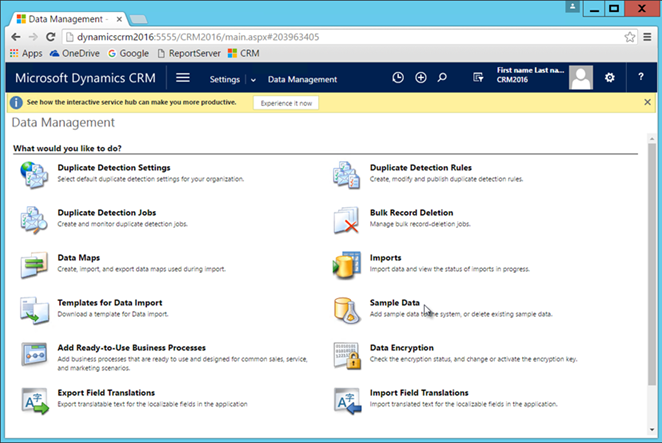
- Go and install the Sample Data
Extra CRM Users Creation (Optional)
- Click on the main menu “Settings” and pick “Security”
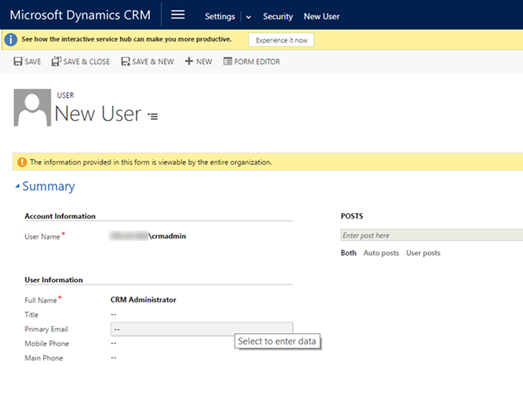
- Click on “Users” and click the button “+ New”

-
Enter a user name of someone that is already in your Active Directory
- E.g our CRM Administrator created earlier with user name = crmadmin
- Data will be autocompleted from AD
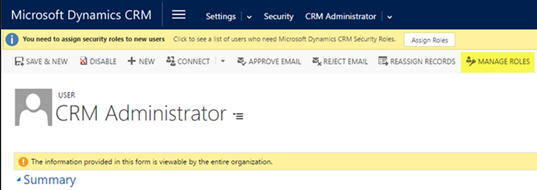
- Click “Save”
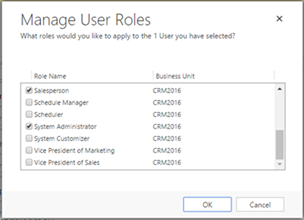
- Once the user is saved, click button “Manage Roles”
-
Typically for our CRM Administrator we select the roles:
- “Activity Feeds”
- “Salesperson”
- “System Administrator”

Thanks a lot for this great post. That was exactly what I was searching for.
LikeLike